- Lesson:jsgamer
- Please login to keep your results
- Welcome,
Why Javascript?
Javascript is a great choice for game development because:
- You can develop on PC, Mac or Linux. Just use a text editor and your browser
- Game can work on all devices if published on the web.
- No software to download
You can use any text editor, but we recommend one with syntax highlighting for javascript.
Warning
Javascript is Case Sensitive so this means eg. the following can cause problems
getElementbyId('car') //note g and d are lowercase,
Also, missing semi-colons (both in CSS and JS) will also cause you pain!!!
Getting Started
You will need to create a text file game.html and save it into a folder called game
- game.html (click on this to open the game in the browser)
game.html
Copy the contents into game.html and save. Its important to get the .extension correct so that clicking on game.html will open the game up in a browser
<style>
  <--- css goes in-between the style tags -->
#car {
  position:absolute;  /*"left" doesn't work without this */
  background:red;
  width:100px;
  height:100px;
  left:0px;
}

</style>

<body>
  <--- html goes in-between the body tags -->

  <div id="car"></div>
</body>

<script>
  <--- javascript goes in-between the script tags-->
</script>
External Javascript (Alternative Method)
Does not work on the JIS network
Some people like to keep the javascript in a separate file. As it keeps the game logic separate from the html and css. If you would like to do this change the 2 script tags as follows:
<script src=game.js></script>
would link game.html to game.js
Adding javascript
You can either type in the code, which might help you understand it. Or copy and paste it from the following file into javascript.txt
//define the player as the circ from the html
var player = document.getElementById("car");

//to prove js is working on the css style
player.style.background = 'blue';

//call the gameloop every 20 milliseconds = 5fps
var intervalId = setInterval(gameloop, 20);

//Add the Envent Listener for keyboard to trigger the Handler
document.addEventListener('keydown', EventHandler );

//define other movement global variables
var x = 0;
var y = 0;

// end of the main program
Gameloop
Add the following to the bottom of your javascript in-between the script tags in game.html
function gameloop(){
    //game logic goes here

    //redraw (move) statement
    player.style.left = x;
    player.style.top = y;

} //end of gameloop
Keydown Event
Add this code below your gameloop in game.html. It will allow you to control the car using the W,A,S,D keys:
function EventHandler(event){
//globals x,y can be used in this handler

  if (event.code == 'KeyD') {
    x = x + 10;
  }
  if (event.code == 'KeyA') {
    x = x - 10;
  }
  if (event.code == 'KeyW') {
    y = y -10;
  }
  if (event.code == 'KeyS') {
    y = y + 10;
  }
} //end of the event handling function.
  //The Listener loops through this function continuously
  //passing the event as a parameter (in the brakets) is necessary for Firefox and Safari but not Chrome
Outside Room
If the car gets to the edge of the game area screen we are going to restart it at x=50; y=50;
//Detect left and right walls,
if (x < 0 || x > 600) {
  x = 50;
  y = 50;
}
//you will also have to do top and bottom of the boundary
Boolean / Logical Operators
|| is boolean OR in Javascript
&& is boolean AND in Javascript
Draw the Boundary
If you want to draw the boundary you need to add it to your css and html
CSS
#boundary {
  position:absolute;
  background:yellow;
  top:0px;
  left:0px;
  height:500px;
  width:500px;
}
Html
Must come before the Car or the car will be hidden
<div id=boundary></div>
Sprites
In game.html add the following css to the #car {
background-image: url("car-animated.gif");
Then right click the image above and save it into your game folder as ‘car-animated.gif’
The dimensions are 184 x 84 px. You will need these values for the collision detection with the grasss
(Thanks to Chloe C for the Image)
Animation
Continuous animation can be achieved with an animated gif. More complex animations in response to code can be added to the Event Handler or a collision detection statement in the game loop.
player.style.transform = scaleX(-1);      //flip horizontal
player.style.transform = 'rotate(-90deg)';  //rotate left 90 deg
player.style.transform = scale(2, 2,);    //Scale by 200%
player.src = Car-crashed.gif              //Change the image
Multiple Transforms
If you add a second CSS/Style transform statement the first once gets cancelled. So, have just one transform line with the different types separated by space.
player.style.transform = scaleX(-1) rotate(-90);
Grass
Add the central reservation using the following CSS inside your < style &rt;’ tags in game.html:
.grass {
  position:absolute;
  background:green;
}
#g1{left:100px; top:100px; width:300px; height:300px;}
Then add the following html after your
<div class=grass id=g1></div>
you can add g2 (and g3,etc) in the following way:
CSS
#g2{left:300px; top:300px; width:300px; height:300px;}
HTML
<div class=grass id=g2></div>
Collision Detection
So if you hit the grass you should respawn back at the start where x = 50 and y = 50
Gameloop
checkgrass ( 100, 100, 300, 300); //checks g1
After Gameloop
function checkgrass (grassx, grassy, grasswidth, grassheight){
 var carwidth = 50;
 var carheight = 50;
 if (x > grassx - carwidth && x < grassx + grasswidth && y > grassy - carheight && y < grassy + grasswidth){
   //respawn player
   x= 50;
   y= 50;
 }
}
You should thoroughly check that the collision detection works on g1 before adding g2 etc. The fact that the car is using a step based movement should make this job possible.
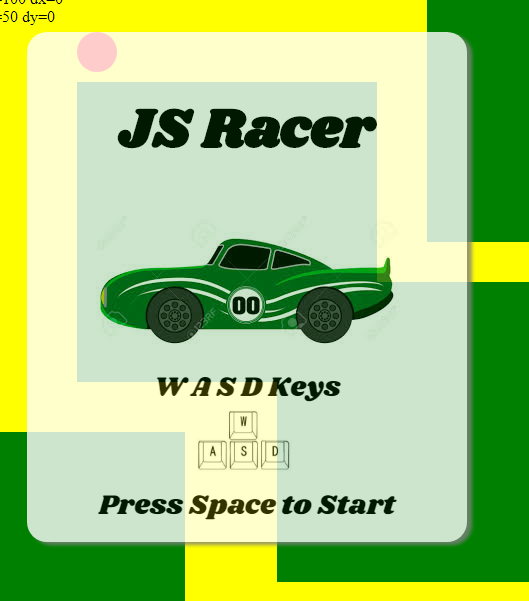
Instructions
To add instructions or gameover screens (see image below)
CSS
This puts instuctions over-layed on layer 2 The game is on layer 1. The Javascript will switch the instructions to layer -1 for the game to start.
#instructions {
  position:absolute;
  background:white;
  opacity: 0.8;
  border-radius:20px;
  box-shadow:5px 3px 5px grey;
  left:50px;
  top:50px;
  height:470px;
  width:400px;
  z-index:2;
  padding:20px;
  font-family: 'Shrikhand', serif;
  text-align:center;
  font-size: 28px;
}
HTML
<link rel="stylesheet"
href="https://fonts.googleapis.com/css?family=Shrikhand">
<div id="instructions">
<h1>JS Racer</h1>
<img src="title.jpg"/><br>
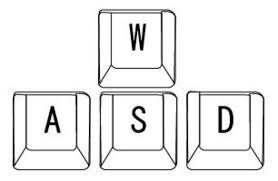
W A S D Keys<br>
<img src="wasd.jpg" width=100px/><br>
Press Space to Start
</div>
JS
This code goes in the event handler. It will remove the instructions but putting them behind the game on layer -1 (lower than 1)
if (event.code == 'Space'){
  document.getElementById("instructions").style.zIndex = -1;
}
Images
Right click and save the following images into your ‘game’ folder

Car image from those wonderful people at 123DF.com
Finish the Game
You could try
- 1 or 2 Player?
- Buttons for Ipad/ Android
- Swipe
- Mouse
- Map editor